Definition of Micrometer
A micrometer, often called a micrometer screw gauge, is a precise measuring instrument used to determine small distances or thicknesses with exceptional accuracy. Consisting of a calibrated screw and a scale, it operates by translating rotational motion into linear displacement. The screw advances a spindle against the object being measured, with the scale indicating the exact distance moved. Typically used in manufacturing, engineering, and scientific research, micrometers are indispensable for applications demanding precise measurements in the range of micrometers (millionths of a meter) or millimeters. Their reliability and precision make micrometers vital tools in fields requiring meticulous dimensional analysis and quality control.
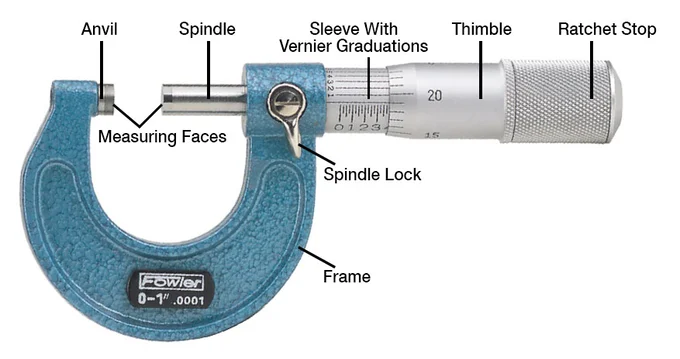
Part Details with Diagram
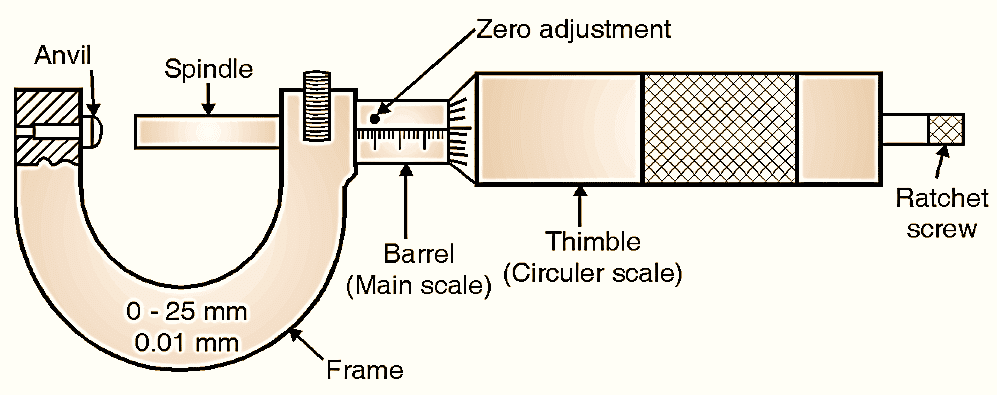
A micrometer consists of several key parts that enable precise measurements. Here’s a brief description of each part along with a simplified diagram –
- Frame: The main body of the micrometer that provides structural support.
- Anvil and Spindle: The anvil is a stationary flat surface, while the spindle is a movable rod-like component. The job which is to be measured is placed between the anvil & spindle.
- Thimble: The thimble is a rotating sleeve attached to the frame. It has a graduated circular scale on its outer surface.
- Sleeve: The sleeve houses the thimble and provides a gripping surface for rotation.
- Ratchet Stop: A mechanism that prevents over-tightening, ensuring consistent pressure on the object being measured.
- Locking Clamp: A lever or mechanism used to lock the spindle in place once the measurement is set.
- Barrel: The cylindrical part connecting the frame and the sleeve. It often contains additional scales for finer measurements.
- Vernier Scale: A secondary scale on the sleeve that aligns with the main thimble scale. It helps achieve more accurate measurements by reading the aligned lines.
Working Principle
A micrometer works on the principle of translating rotational motion into linear displacement to measure extremely small distances with high precision. It consists of an anvil (stationary reference point), a spindle (movable component), and a calibrated screw mechanism.
When measuring an object, the anvil and spindle are positioned on either side of it. As the thimble or sleeve is rotated, the spindle moves towards or away from the anvil due to the threading of the screw mechanism. This rotation causes the linear displacement of the spindle.
The linear displacement is converted into a readable measurement using the graduated scale on the thimble and the barrel of the micrometer. The main thimble scale provides a rough measurement, while the smaller Vernier scale on the sleeve allows for more accurate readings by aligning with the thimble scale.
The user tightens the micrometer onto the object using the ratchet stop to apply consistent pressure. The measurement is taken where the edge of the thimble scale aligns with the edge of the Vernier scale, indicating the measurement down to a fraction of the smallest scale division.
The precision of a micrometer arises from the fine threading of the screw mechanism, enabling the spindle to move a precise distance for each rotation of the thimble. This mechanism, coupled with the Vernier scale, allows micrometers to achieve measurements as accurate as a thousandth of a millimeter or even better, making them essential tools in fields requiring meticulous dimensional analysis and quality control.
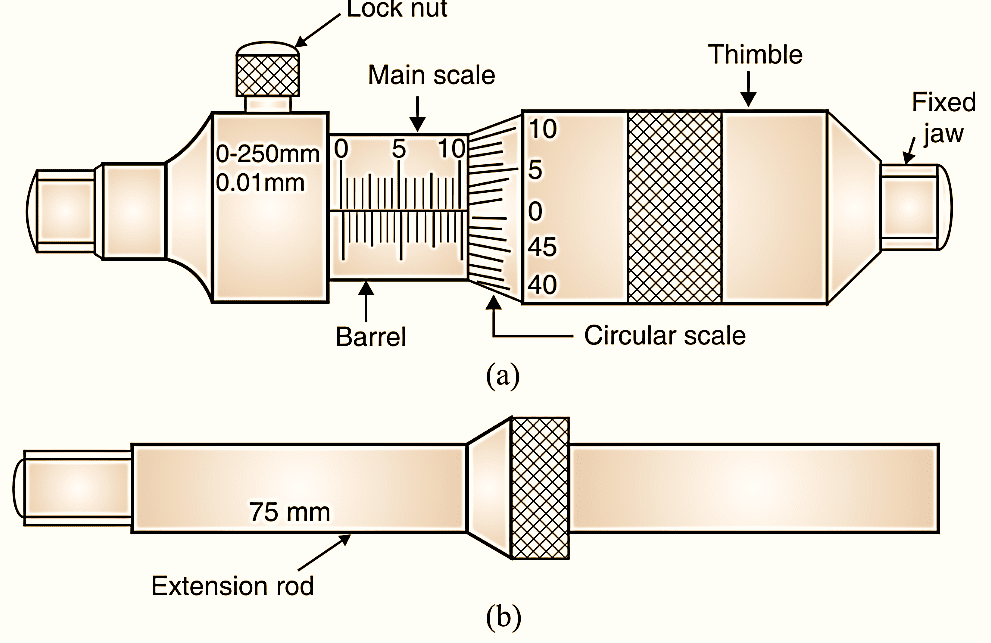
Least Count
The least count of a measuring instrument, such as a micrometer, refers to the smallest measurement that can be read or distinguished using that instrument’s scale. It’s the incremental value between two consecutive scale markings that can be discerned with the naked eye. In other words, it represents the instrument’s precision and the smallest unit it can measure.
For a micrometer, the least count is determined by the pitch of the screw mechanism and the number of divisions on the Vernier scale. The pitch of the screw refers to the distance the spindle advances or retreats for one complete rotation of the thimble. The Vernier scale provides finer divisions to improve the accuracy of measurements.
The formula to calculate the least count –
Least Count = Pitch of the Screw / Number of Divisions on Vernier Scale
Here’s a step-by-step explanation
Pitch of the Screw (P): Measure the distance the spindle moves along the screw’s axis for one complete rotation of the thimble. This value is often provided by the manufacturer and is typically expressed in millimeters per revolution.
Number of Divisions on Vernier Scale (N): Count the number of equally spaced divisions on the Vernier scale. This count represents how many divisions coincide with one division on the main scale (thimble scale).
Calculation: Divide the pitch of the screw by the number of divisions on the Vernier scale.
Example:
Let’s say the pitch of the screw (P) is 0.5 mm per revolution and the Vernier scale has 50 divisions (N).
Least Count = Pitch of the Screw / Number of Divisions on Vernier Scale
Least Count = 0.5 mm / 50 = 0.01 mm
In this example, the micrometer’s least count is 0.01 mm or 10 micrometers. This means that the micrometer can measure differences in length down to 0.01 mm, which is the smallest change that can be visually identified on the Vernier scale.
Understanding the least count is crucial when using any measuring instrument, as it provides insight into the precision of the instrument and helps users accurately interpret the measurements they obtain.
What is Zero Error?
Zero error in a micrometer is a significant concept that can affect the accuracy of measurements. It occurs when the micrometer’s measuring system does not read zero when the spindle and anvil are in direct contact without any object being measured. In other words, the micrometer incorrectly indicates a value other than zero when it should ideally show no measurement.
There are two types of zero errors in micrometers –
Positive Zero Error
In this case, the micrometer’s thimble scale reads a value greater than zero when the spindle and anvil are in contact. This happens when there is a slight separation between the measuring faces of the spindle and the anvil. As a result, the micrometer registers a positive offset from the actual zero point.
Negative Zero Error
Here, the thimble scale reads a value less than zero when the spindle and anvil are in contact. This occurs when the measuring faces are slightly in contact when the thimble scale reads zero. As a result, the micrometer registers a negative offset from the actual zero point.
Causes of Zero Error: Zero errors can arise due to various factors, including wear and tear of the micrometer’s measuring faces, improper calibration, manufacturing defects, or accumulation of dirt or debris between the measuring surfaces.
Impact on Measurements: If not accounted for, zero errors can lead to inaccurate measurements. For instance, if a micrometer has a positive zero error of 0.02 mm, any measurement taken with it will be off by that amount. To obtain accurate measurements, the zero error needs to be considered and adjusted for.
Correcting Zero Error: To correct zero error, follow these steps –
- Identify the Type: Determine whether the zero error is positive or negative by noting the reading when the spindle and anvil are in contact.
- Adjust the Measurement: When taking measurements, always account for the zero error. For a positive zero error, subtract the zero error value from the measurement. For a negative zero error, add the absolute value of the zero error to the measurement.
- Calibration: Periodically calibrate the micrometer using calibration tools and techniques. This can involve adjusting or repairing the micrometer to minimize zero error and maintain accurate measurements.
Zero error is a critical consideration to ensure the reliability and precision of measurements made using micrometers. Ignoring zero error can lead to significant measurement discrepancies and compromise the quality of results obtained in fields where precision is crucial, such as manufacturing and engineering.
Types
Here are some common types of micrometers –
Outside Micrometer (External Micrometer)
This is the most basic type of micrometer. It’s used to measure the external dimensions of objects, such as diameter, thickness, or length. It consists of an anvil, a spindle, and a frame. The anvil remains stationary while the spindle moves towards it, measuring the object’s dimensions.
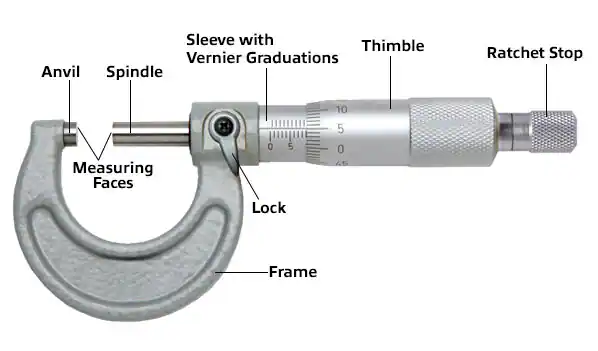
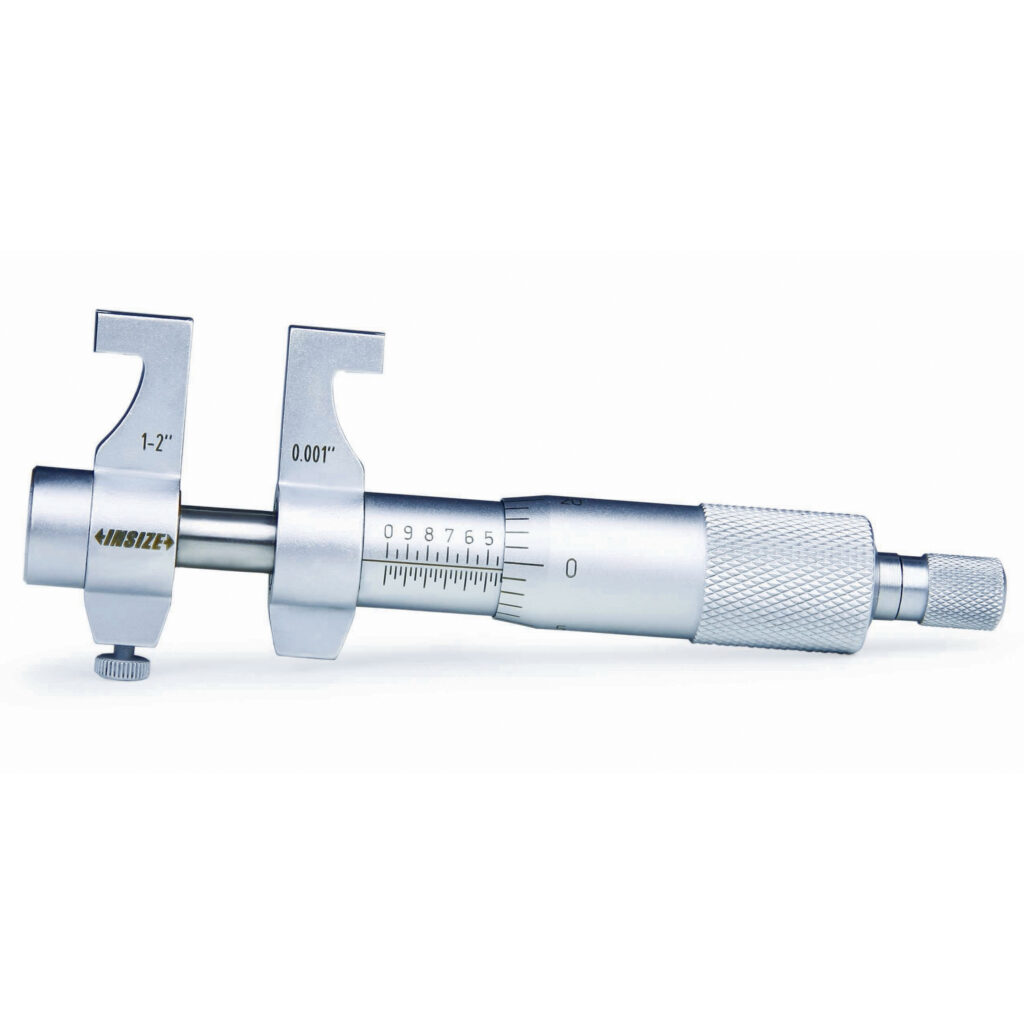
Inside Micrometer (Internal Micrometer)
Inside micrometers are used to measure the internal dimensions of holes or bores. They consist of a tubular body with two contact points: one is movable (the measuring spindle), and the other is stationary (the anvil). The measurement is taken by adjusting the spindle until it fits snugly inside the hole.
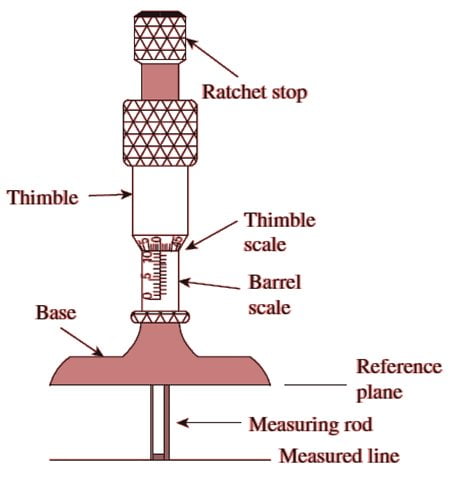
Depth Micrometer
Depth micrometers are designed to measure the depth of holes, slots, or recesses. They consist of a base, a measuring rod, and a micrometer head. The measuring rod extends into the hole, and the depth is read from the micrometer head.
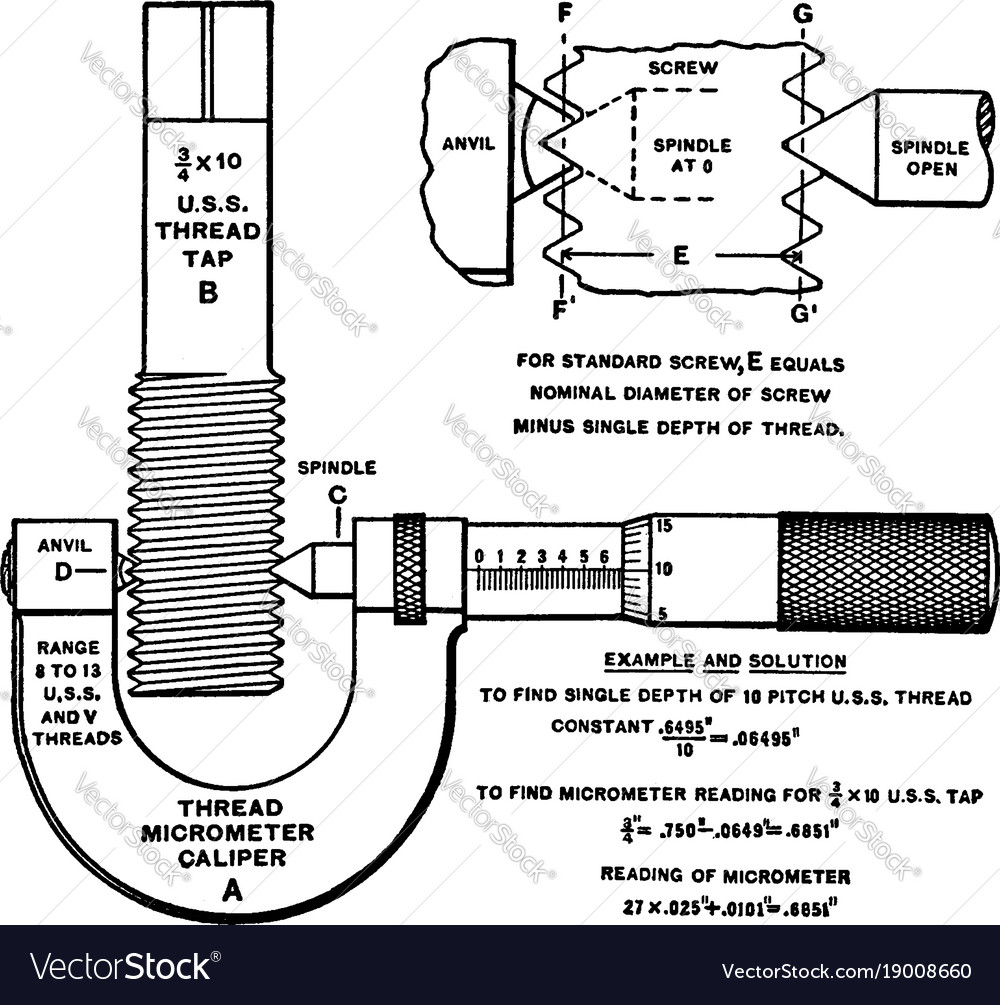
Thread Micrometer
Thread micrometers are used to measure the pitch diameter of screw threads. They have specialized anvils that match the shape of the thread. Thread micrometers can be used for both external and internal threads.
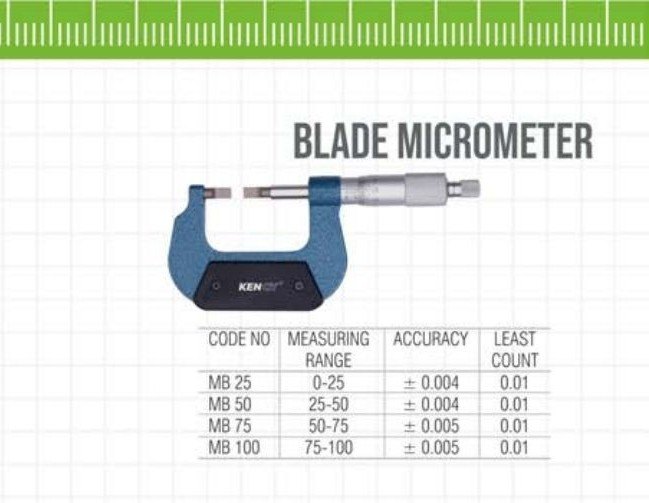
Blade Micrometer
Blade micrometers have a narrow anvil and spindle, making them suitable for measuring narrow or small features, such as the width of a groove or the thickness of a key.
Pitch Micrometer
Pitch micrometers are used to measure the distance between two adjacent threads in screw threads. They are particularly useful for measuring the pitch of very fine threads.
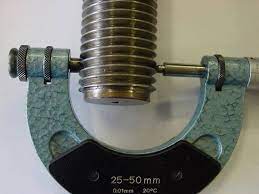
V-Anvil Micrometer
V-anvil micrometers are designed for measuring round objects like shafts or pins. They use a V-shaped anvil to ensure proper contact and measurement of cylindrical objects.
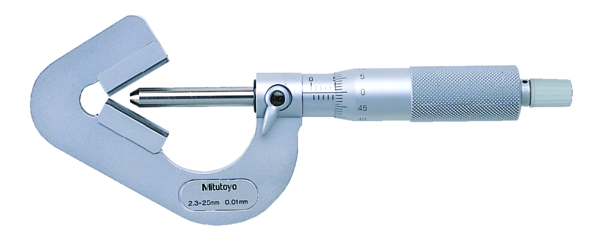
Tube Micrometer
Tube micrometers are specialized for measuring the thickness of tubes or pipes. They have a V-shaped anvil that conforms to the curve of the tube.
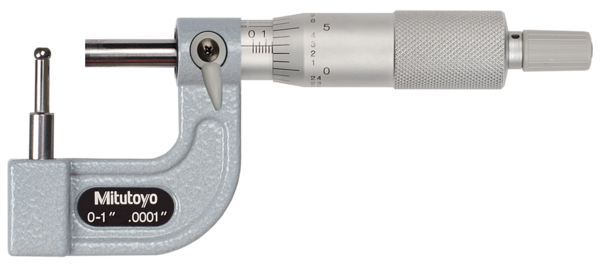
Spline Micrometer
Spline micrometers are used for measuring the dimensions of splines, which are ridges or teeth on a shaft.
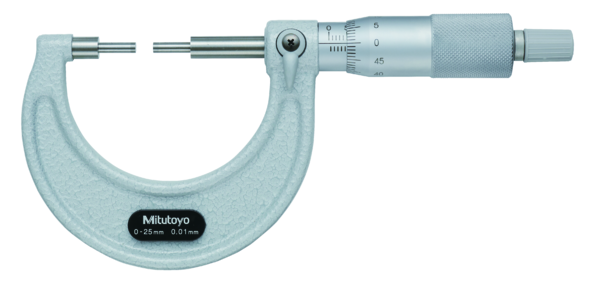
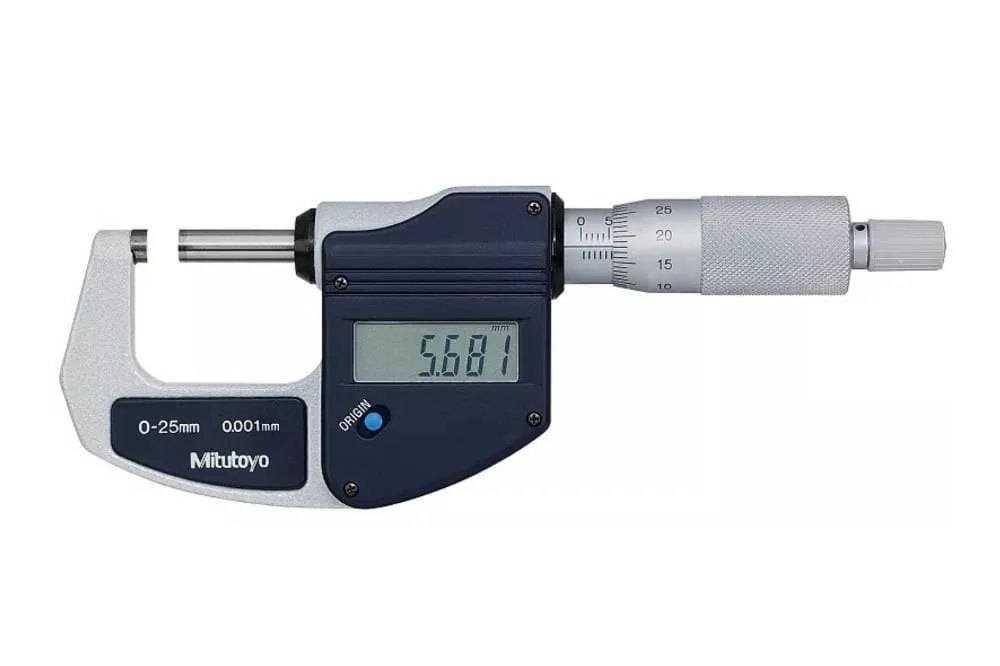
Digital Micrometer
Digital micrometers provide a digital readout of measurements, eliminating the need to read the scale and Vernier. They are easy to read and often offer features like data output and preset measurements.
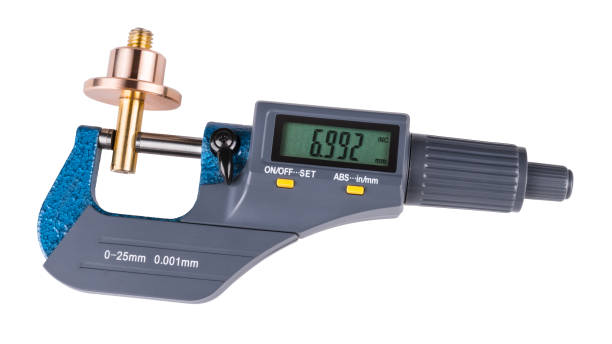
Coolant-Proof Micrometer
These micrometers are designed for use in environments with coolant or liquids. They have additional seals to prevent damage from exposure to fluids.
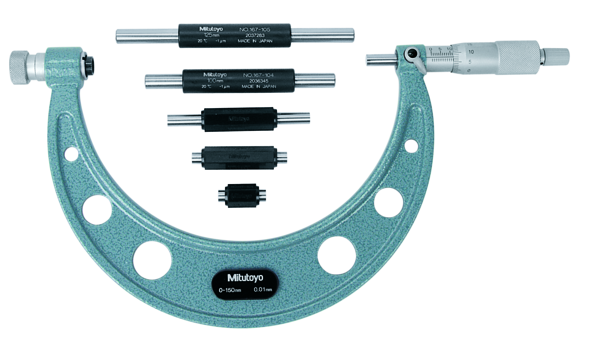
Interchangeable Anvil Micrometer
These micrometers allow for the attachment of various types of anvils to measure different shapes and sizes. These are just a few examples of the many types of micrometers available, each catering to specific measurement needs in various industries and applications.
Maker
Here is a list of some well-known micrometer makers –
- Mitutoyo: One of the most recognized names in metrology, Mitutoyo produces a wide range of precision measurement instruments, including micrometers.
- Starrett: The L.S. Starrett Company is renowned for its precision tools, and they offer a variety of micrometers for different applications.
- Fowler High Precision: Fowler specializes in metrology instruments and tools, including micrometers, for industries like manufacturing and quality control.
- Brown & Sharpe: Known for their precision measurement tools, Brown & Sharpe offers a range of micrometers for dimensional measurement.
- Tesa: A Swiss company that manufactures precision instruments, including micrometers, for industries like manufacturing and aerospace.
- Mahr: Mahr produces a variety of measurement solutions, including micrometers, for industries ranging from automotive to medical technology.
- SPI (Swiss Precision Instruments): SPI provides a range of precision measuring tools, including micrometers, that cater to industries like manufacturing and machining.
- Insize: Insize produces a wide range of metrology instruments, including digital and analog micrometers, for industries globally.
- Moore & Wright: A UK-based manufacturer known for their precision tools, Moore & Wright produces micrometers for various applications.
- Gedore: While primarily known for hand tools, Gedore also produces measuring tools like micrometers used in mechanical and automotive industries.
Applications
Micrometers find extensive applications in industries and fields where precise measurements are crucial. Here are five key applications of micrometers –
- Manufacturing and Engineering: Micrometers are essential tools in manufacturing and engineering industries for quality control, ensuring components meet specified tolerances. They are used to measure the dimensions of parts such as shafts, bores, and threads, ensuring they meet design specifications.
- Aerospace and Aviation: In the aerospace sector, where safety and precision are paramount, micrometers are employed to measure critical components like turbine blades, engine parts, and fasteners to ensure accurate fits and optimal performance.
- Automotive Industry: Micrometers are widely used to measure engine components, brake parts, pistons, and other critical elements in the automotive manufacturing process, guaranteeing functionality, efficiency, and safety.
- Medical and Healthcare: In medical equipment and device manufacturing, micrometers are used to ensure precise dimensions of surgical tools, implants, and components in diagnostic equipment, contributing to accurate medical procedures and diagnoses.
- Research and Development: Researchers in various scientific disciplines rely on micrometers to measure the dimensions of specimens, samples, and experimental setups. Micrometers help researchers achieve accuracy in their experiments and data collection.
Advantages
Micrometers offer several advantages due to their precision and accuracy in measurements. Here are five key advantages of using micrometers –
- High Precision: Micrometers provide extremely accurate measurements, often down to the micrometer (µm) or even sub-micrometer range. This level of precision is essential in industries like manufacturing, where tight tolerances must be maintained.
- Versatility: Micrometers come in various types, including outside, inside, depth, and specialized micrometers for specific measurements. This versatility allows them to be used in a wide range of applications, from measuring lengths and diameters to depths and threads.
- Repeatable Measurements: Once calibrated and properly used, micrometers provide consistent and repeatable measurements. This reliability is crucial in quality control and manufacturing processes to ensure uniformity and adherence to specifications.
- Non-Destructive Measurement: Micrometers offer non-destructive measurement, meaning they don’t alter the object being measured. This is particularly important when measuring delicate or sensitive components that must remain intact.
- Minimal Parallax Error: The design of micrometers, with a clear and easy-to-read scale and Vernier, minimizes the chances of parallax error (misalignment causing measurement inaccuracies). This aids in accurate readings and reduces operator errors.
- Digital Options for Ease: Digital micrometers provide an easy-to-read digital display, eliminating the need to interpret Vernier scale readings. They often have features like data output and presets for enhanced convenience.
- Durability and Longevity: Well-manufactured micrometers are built to withstand wear and tear, making them durable tools that can provide accurate measurements over a long lifespan when properly maintained.
- Quality Assurance: In industries requiring stringent quality control, micrometers play a critical role in ensuring products meet specified standards and tolerances, contributing to overall product quality and customer satisfaction.
Overall, micrometers offer a combination of precision, versatility, and reliability that makes them indispensable tools in various industries, from manufacturing to research, where accurate measurements are essential.
Limitations
While micrometers offer numerous advantages, they also have certain limitations that users should be aware of. Here are some limitations of micrometers –
- Limited Range: Micrometers are designed for measuring small dimensions, typically in the range of millimeters to a few centimeters. For larger measurements, other instruments like calipers or measuring tapes might be more suitable.
- Specific Applications: Different types of micrometers are tailored for specific applications (e.g., outside, inside, depth micrometers). Using the wrong type for a particular measurement can lead to inaccurate results.
- Skill and Training: Proper use of a micrometer requires skill and training. Errors can occur due to incorrect technique, improper pressure application, or misinterpretation of readings, particularly when using manual micrometers with Vernier scales.
- Zero Error: Micrometers can have zero errors (positive or negative) due to wear, improper calibration, or other factors. Neglecting zero error can lead to inaccurate measurements if not compensated for.
- Fragility: Some micrometers, especially those with delicate components like the measuring spindle and anvils, can be fragile. Rough handling or misuse can lead to damage that affects measurement accuracy.
- Environmental Influences: Temperature variations and humidity can affect the dimensions of objects being measured, impacting the accuracy of measurements. Some micrometers are equipped with compensation features to minimize these effects.
- Limited Accessibility: In cases where the object being measured is in a confined or hard-to-reach space, micrometers might not fit or allow accurate measurements.
- Time-Consuming: Taking measurements with a manual micrometer, especially when using a Vernier scale, can be time-consuming compared to digital measurement tools.
- Limited Data Output: Traditional analog micrometers lack data output capabilities, making it challenging to integrate measurements directly into digital systems without manual data entry.
- Cost: High-quality micrometers, especially those with advanced features or digital capabilities, can be expensive. This cost might not be justifiable for applications that don’t demand high precision.
It’s essential to consider these limitations when using micrometers and choose the appropriate measuring tool for the task at hand. When used correctly and within their design limitations, micrometers remain powerful tools for achieving precise measurements in various industries.
FAQ’s
How to read a micrometer?
Reading a micrometer requires careful attention to detail and an understanding of its scale and measurement system. Here’s a step-by-step guide on how to read a manual micrometer with a Vernier scale:
Step 1: Familiarize Yourself with the Micrometer: Understand the different parts of the micrometer – the frame, thimble, Vernier scale, and spindle. Ensure the micrometer is clean and in proper working condition.
Step 2: Set the Zero Point (Zero Error): Ensure that the micrometer is properly calibrated, and any zero error is accounted for. Close the micrometer so that the anvil and spindle make contact, and the thimble scale reads zero.
Step 3: Place the measurement object: Position the object between the anvil and the spindle. Make sure the object is properly aligned and secured.
Step 4: Initial Measurement: Begin by rotating the thimble (using the ratchet stop if available) to advance the spindle toward the object. Rotate until you feel slight resistance.
Step 5: Main Scale Reading: Note the main scale reading on the sleeve that aligns with the reference line on the frame. This is your main measurement value.
Step 6: Vernier Scale Reading: Next, look at the Vernier scale on the thimble. Find the Vernier line that aligns with any line on the main scale. Note the value of this aligned Vernier line on the thimble scale.
Step 7: Calculate the Measurement: Add the reading of the main scale with the Vernier scale reading. This sum represents your measurement value in millimeters.
Step 8: Account for Zero Error (if necessary): If your micrometer has a zero error (positive or negative), adjust your final measurement accordingly by either adding or subtracting the zero error value.
Step 9: Record the Measurement: Write down or record the measurement value, making sure to include the appropriate units (millimeters, micrometers, etc.).
Step 10: Clean and Reset: After taking the measurement, carefully release the ratchet stop (if used) and remove the object. Clean the measuring surfaces of the anvil and spindle to ensure accurate readings for the next measurement.
Remember, practice and familiarity with your specific micrometer model are essential for accurate measurements. If you’re using a digital micrometer, the process is simplified as the measurement is displayed digitally, eliminating the need for interpreting Vernier scales. Always consult the manufacturer’s instructions for your specific micrometer model for any unique features or procedures.
What is a micrometer used for?
A micrometer is a precision measuring instrument utilized to accurately measure small distances, dimensions, or thicknesses with exceptional accuracy. It finds widespread applications in industries and fields where precise measurements are vital. Primarily used in manufacturing, engineering, and scientific research, micrometers ensure that components meet stringent tolerances. They are employed to measure various objects, including diameters, lengths, depths, threads, and more.
The aerospace industry employs micrometers to measure turbine blades and engine components, ensuring safety and optimal performance. Similarly, the automotive sector uses micrometers to gauge engine parts and ensure efficiency. In medical manufacturing, they verify the dimensions of surgical instruments and diagnostic equipment. Researchers rely on micrometers for accurate data collection, while fields like optics, electronics, and textiles utilize them for consistent product quality. In essence, micrometers are indispensable tools enabling meticulous dimensional analysis and quality control in diverse applications.

Your article helped me a lot, is there any more related content? Thanks!