Introduction
Mold polishing is a critical process in manufacturing and design industries, enhancing the quality and functionality of molded products. To achieve impeccable results, mastering the art of mold polishing requires the right tools and techniques. In this comprehensive guide, we will delve into the world of mold polishing tools, understanding their uses, and exploring how they contribute to the creation of flawless molds.
Understanding the Importance of Mold Polishing
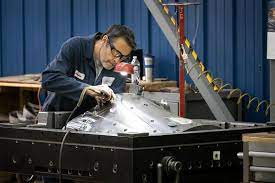
Mold polishing is a critical process in various industries, especially manufacturing and design, where the quality and precision of molded products are essential. Here’s the importance of mold polishing explained in a stepwise manner –
Step 1: Surface Quality Enhancement
- Polishing eliminates imperfections like tool marks, scratches, and rough spots on the mold’s surface.
- Achieves a smooth and flawless finish that translates to the final product, enhancing its aesthetic appeal.
Step 2: Improved Functionality
- A well-polished mold ensures easy and smooth ejection of the final product, reducing the risk of damage or defects during demolding.
- Reduces friction and wear between the mold and the material being molded, leading to improved product quality and longer mold lifespan.
Step 3: Defect Prevention
- Polishing eliminates potential sources of defects in the molded products, such as blemishes caused by uneven surfaces or rough textures.
- Minimizes the likelihood of air pockets, surface inconsistencies, and other flaws that could arise from an imperfect mold surface.
Step 4: Precision and Consistency
- Consistent mold polishing ensures uniformity across multiple moldings, maintaining consistent product dimensions, surface finish, and overall quality.
Step 5: Reduction of Post-Processing
- A well-polished mold reduces the need for extensive post-processing, such as sanding or finishing, on the final product.
- This leads to time and cost savings in the manufacturing process.
Step 6: Material Savings
- A polished mold minimizes material waste caused by defects, misshapen parts, or rejections due to poor mold quality.
- Maximizes material usage efficiency, contributing to cost savings.
Step 7: Enhanced Brand Image
- High-quality molds lead to high-quality products, bolstering the reputation of manufacturers and designers.
- Aesthetic appeal and consistency in finish create positive customer perceptions.
Step 8: Versatility and Flexibility
- Polishing opens up opportunities for producing intricate designs and complex shapes that demand a high level of precision and a flawless finish.
Step 9: Longevity of Molds
- Regular polishing maintains the mold’s structural integrity, preventing degradation or wear and tear.
- Increases the mold’s lifespan, reducing the need for frequent replacements.
Step 10: Industry Compliance
- In industries like medical devices or aerospace, where precision and quality are paramount, properly polished molds are often required to meet regulatory standards.
In summary, mold polishing is not just about aesthetics; it’s a fundamental process that impacts the functionality, quality, and overall success of manufactured products. By achieving a polished surface, manufacturers ensure the best possible outcome in terms of appearance, functionality, and consistency.
Essential Mold Polishing Tools
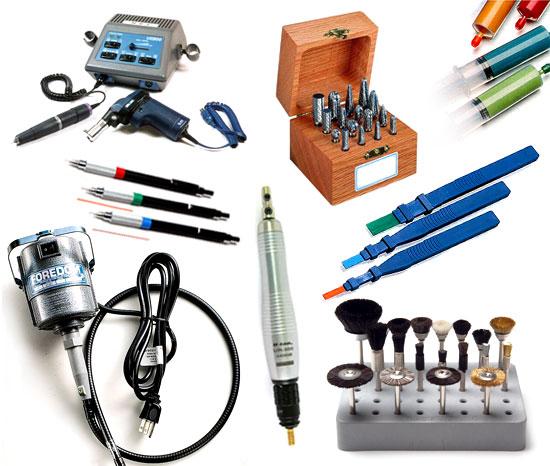
1. Diamond Files and Stones – Mold Polishing Tools
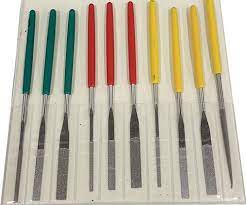
These tools are indispensable for precise and intricate polishing tasks. Diamond files and stones are available in various grits, allowing craftsmen to achieve different levels of smoothness and shine.
2. Polishing Compounds and Abrasives – Mold Polishing Tools
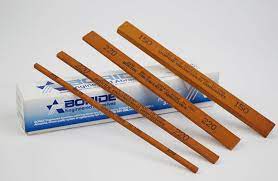
These compounds are designed to work with various materials, from plastics to metals. They aid in removing imperfections and achieving a smooth surface.

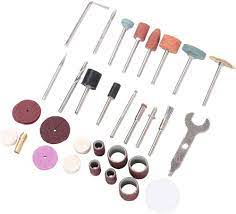
3. Rotary Tools – Mold Polishing Tools
Rotary tools equipped with various attachments such as polishing wheels, brushes, and buffing pads offer versatility in mold polishing. They are efficient for both rough and fine polishing processes.
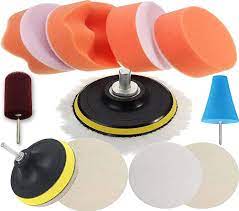
4. Microfiber Cloths and Pads – Mold Polishing Tools
These soft materials are used in conjunction with polishing compounds for the final shining touches. They ensure a uniform and pristine finish.
5. Ultrasonic Polishers – Mold Polishing Tools
These tools utilize ultrasonic vibrations to achieve intricate and delicate polishing on complex molds.
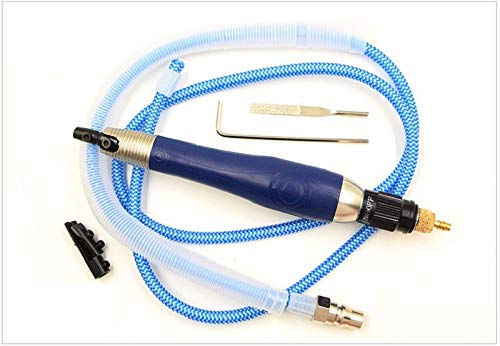
6. Air Polishers – Mold Polishing Tools
Air-powered polishers are ideal for large mold surfaces, providing consistent polishing action and preventing overheating.
7. Lapping Machines – Mold Polishing Tools
These precision machines use abrasive compounds to achieve high levels of flatness and surface finish.
The Step-by-Step Process
Polishing a mold is a meticulous process that involves gradually refining the mold’s surface to achieve a smooth and flawless finish. Here’s a step-by-step guide on how to polish a mold:
Step 1: Preparation
- Clean the mold thoroughly to remove any contaminants or residues.
- Inspect the mold surface for imperfections such as scratches, tool marks, or rough spots that need to be addressed during polishing.
Step 2: Rough Polishing
- Begin with coarse abrasives or diamond files to remove larger imperfections.
- Use a back-and-forth or circular motion, applying consistent pressure to the areas that need refining.
- To prevent the creation of uneven areas, keep the tool moving.
Step 3: Fine Polishing
- Transition to finer abrasives or polishing compounds.
- Continue using a gentle and controlled motion to gradually smoothen the surface.
- Work systematically, ensuring even coverage across the entire mold.
Step 4: Buffing and Final Polishing
- Switch to soft microfiber cloths or polishing pads.
- Apply a polishing compound or paste to the cloth or pad.
- Use light pressure and circular motions to buff the mold’s surface to a higher shine.
- Continue buffing until you achieve the desired level of glossiness.
Step 5: Cleaning and Inspection
- Clean the mold to remove any residual polishing compounds or debris.
- Inspect the mold carefully to ensure that all imperfections have been addressed.
- Look for any remaining scratches, dull spots, or inconsistencies.
Step 6: Final Touches
- If necessary, repeat the fine polishing and buffing steps to further enhance the mold’s appearance.
- Ensure that the mold’s surface is smooth, uniform, and free from defects.
Step 7: Protection
- Apply a protective coating, such as a wax or polymer sealant, to preserve the polished finish and prevent future oxidation or degradation.
It’s important to note that the specific tools and techniques used can vary based on the type of mold material, the level of detail required, and the intended application of the mold. Polishing a mold requires patience, skill, and attention to detail to achieve the best results.
Applications of Mold Polishing Tools
- Injection Molding: Achieving smooth and defect-free surfaces on injection molds for products like consumer goods and automotive parts.
- Die Casting: Enhancing the performance and longevity of die-cast molds used in metal fabrication.
- Blow Molding: Polishing molds for bottles, containers, and packaging materials to ensure clarity and precision.
- Precision Engineering: Creating molds for micro-components used in electronics, medical devices, and aerospace industries.
Conclusion of Mold Polishing Tools
Mold polishing is the bridge between a mold’s creation and the production of superior products. The comprehensive array of mold polishing tools available empowers craftsmen to create molds of exceptional quality and precision. By understanding these tools and their applications, professionals can take their mold polishing skills to new heights, ultimately contributing to the excellence of manufactured goods across various industries.
FAQ’s
How do you Polish Mold?
1. Preparation
Cleaning the mold thoroughly and identifying imperfections to be addressed.
2. Rough Polishing
Using coarse abrasives or files to remove rough marks, scratches, and tooling marks.
3. Fine Polishing
Progressing to finer abrasives or polishing compounds to achieve a smoother surface.
4. Buffing and Final Polishing
Using soft pads, cloths, and compounds for achieving a mirror-like finish.
5. Cleaning and Inspection
Ensuring the mold is free from residues and defects after polishing.
What is Importance of Mould Polishing?
Mold polishing plays a pivotal role in producing high-quality molded products. A well-polished mold surface not only enhances the aesthetics but also ensures smooth ejection of the final product, reduces friction, and prevents defects. The right combination of tools and skills can elevate the overall manufacturing process.
What is Draw Polishing?
Draw polishing” refers to a specific type of polishing technique used in mold-making and machining processes. It is primarily employed to improve the surface finish of molds, particularly in areas that are difficult to access or have intricate geometries. The term “draw polishing” is derived from the concept of “draw,” which refers to the movement of a mold component along its intended direction of ejection.
In the context of mold-making and injection molding, draw polishing involves carefully polishing the surfaces of mold components that are involved in the ejection process. These components often have complex shapes or intricate details, making traditional polishing methods challenging to apply. Draw polishing focuses on achieving a high-quality surface finish in these challenging areas.
Key features and points about draw polishing include:
1. Complex Geometries: Draw polishing is particularly useful for mold components with complex shapes, such as deep undercuts or tight corners, where traditional polishing techniques might not effectively reach.
2. Improved Ejection: The polished surfaces in the ejection area reduce friction and resistance during the ejection process. This minimizes the risk of damaging the molded part and ensures a smooth release from the mold.
3. Specialized Tools: Draw polishing often involves the use of specialized polishing tools and abrasives, such as flexible shafts, micro-abrasive tools, and custom-shaped polishing tips. These tools are designed to navigate intricate geometries and achieve the desired finish.
4. Manual Skill: Draw polishing requires a high level of skill and precision. Craftsmen must carefully control the polishing tools to ensure that the desired finish is achieved without causing any damage to the mold components.
5. Time-Intensive: Due to the intricate nature of the polishing process, draw polishing can be time-consuming. However, the resulting high-quality surface finish justifies the time and effort invested.
6. Mold Performance: Draw polishing contributes to the overall performance of the mold by ensuring smooth and efficient ejection, reducing the chances of defects, and improving the longevity of the mold.
What is Mould Polishing Paste?
Mold polishing paste, also known as polishing compound or polishing paste, is a specialized abrasive product used in the process of polishing molds, dies, and other precision components. It is designed to enhance the surface finish of these components by removing imperfections, scratches, and other irregularities. Mold polishing paste is a key tool in achieving a smooth and flawless surface that is critical for high-quality molded products and precision engineering.
Key features and points about mold polishing paste include:
1. Composition: Mold polishing paste is typically a mixture of abrasive particles suspended in a lubricating or binding medium. The abrasive particles can include various types of minerals, such as diamond, alumina, silica, or cerium oxide. The choice of abrasive material depends on the material being polished and the level of surface finish desired.
2. Grit Levels: Mold polishing paste comes in different grit levels, ranging from coarse to fine. Coarser grits are used for initial polishing stages to remove larger imperfections, while finer grits are used for achieving a smoother and more refined finish.
3. Lubrication: The lubricating or binding medium in the paste serves multiple purposes. It helps carry the abrasive particles across the surface, preventing them from becoming too concentrated in one area and causing uneven polishing. It also helps dissipate heat generated during the polishing process, preventing overheating and potential damage to the mold surface.
4. Application: Mold polishing paste is applied to the surface being polished using soft cloths, pads, or brushes. The paste is spread evenly across the surface, and then the polishing process is carried out using controlled pressure and motion.
5. Polishing Process: During the polishing process, the abrasive particles in the paste abrade the surface, gradually wearing away imperfections and creating a smoother finish. The paste particles break down over time, revealing fresh abrasive material and maintaining consistent polishing action.
6. Final Polishing: In the final stages of polishing, finer grits of mold polishing paste are used to achieve a mirror-like shine on the mold surface. This step contributes to the overall aesthetics and functionality of the mold.
7. Versatility: Mold polishing paste can be used on various materials, including metals, plastics, ceramics, and more. It finds application in industries such as injection molding, die casting, precision engineering, and jewelry making.
8. Precision Polishing: Mold polishing paste is particularly effective for intricate and hard-to-reach areas of molds and dies, ensuring a high-quality finish even in complex geometries.
In summary, mold polishing paste is an essential tool in achieving a superior surface finish on molds and precision components. Its abrasive composition, various grit levels, and lubricating properties make it a versatile and effective solution for achieving the desired level of smoothness, shine, and overall quality in molded products and precision engineering applications.
Name some Mold Polishing Tools.
Here are the names of mold polishing tools –
1. Mold Polishing Tools – Diamond Files and Stones
2. Mold Polishing Tools – Polishing Compounds
3. Mold Polishing Tools – Rotary Tools
4. Mold Polishing Tools – Ultrasonic Polishers
5. Mold Polishing Tools – Air Polishers
6. Mold Polishing Tools – Microfiber Cloths and Pads
7. Mold Polishing Tools – Lapping Machines
8. Mold Polishing Tools – Flexible Shaft Grinders
9. Mold Polishing Tools – Buffing Wheels
10. Mold Polishing Tools -Polishing Stones
11. Mold Polishing Tools – Micro Abrasive Tools
Write about Mold Polishing Methods.
Mold polishing methods encompass a range of techniques employed to enhance the surface quality of molds and precision components. These methods are vital for achieving smooth, flawless, and defect-free surfaces in various manufacturing industries. Here are some brief descriptions of common mold polishing methods –
1. Hand Polishing: This manual technique involves using various abrasive tools, such as files, stones, and sandpapers, to remove imperfections and achieve the desired surface finish. Hand polishing provides control and precision, making it suitable for intricate mold geometries.
2. Machine Polishing: Machine polishing utilizes power tools like rotary tools, grinders, and lapping machines to automate the polishing process. It offers efficiency and consistency for larger mold surfaces and production runs.
3. Ultrasonic Polishing: Ultrasonic polishing involves using ultrasonic vibrations to create a high-frequency oscillation between a tool and a workpiece. This method is effective for detailed polishing and deburring in hard-to-reach areas.
4. Electrolytic Polishing: Electrolytic polishing uses an electric current to dissolve the surface layer of the mold, resulting in a smoother finish. It is particularly useful for molds made of metals like stainless steel.
5. Chemical Polishing: Chemical polishing involves immersing the mold in a chemical solution that reacts with the surface, dissolving imperfections and providing a polished finish. It’s suitable for molds with intricate shapes.
6. Abrasive Blasting: This method uses abrasive particles propelled by air or water to remove surface imperfections. It’s effective for removing stubborn imperfections and achieving consistent textures.
7. Vibratory Polishing: In vibratory polishing, molds are placed in a vibratory machine with abrasive media. The vibrations cause friction between the media and mold, resulting in polishing.
8. Micro Abrasive Jet Polishing: This precision method uses a fine abrasive slurry that is jetted onto the mold surface at high velocities. It’s used for micro-machining and intricate detail work.
9. Cryogenic Polishing: Cryogenic polishing involves freezing the mold and then using abrasive media to achieve a smoother surface. The freezing helps reduce friction and prevents overheating.
10. Magnetic Abrasive Finishing: In this method, magnetic abrasive particles are mixed with a finishing fluid and applied to the mold. The particles are attracted to the mold’s surface, effectively polishing it.
11. Fluidized Bed Polishing: Molds are placed in a fluidized bed containing abrasive particles. The fluidized particles gently polish the mold surface.
12. Tumbling Polishing: Similar to vibratory polishing, molds are placed in a rotating drum with abrasive media. The rotation and friction result in surface polishing.
Each method has its advantages and is chosen based on factors like the mold material, geometry, intricacy, and desired finish. The selection of the appropriate method plays a crucial role in achieving the optimal surface quality for molds and precision components.

Good articles
Thanks sir for your valuable feedback