Introduction
In the world of injection molding, where precision and functionality often take center stage, there exists a lesser-known but equally important artistry – mold engraving. Mold engraving is the process of creating intricate and detailed designs, patterns, or textures on the surface of the mold cavity. These engravings are then transferred onto the final plastic product during the injection molding process. This seemingly decorative aspect of injection molding serves several essential functions, from enhancing aesthetics to improving functionality. In this article, we’ll delve into the world of mold engraving, its applications, techniques, and its impact on the finished products.
The Significance of Mold Engraving
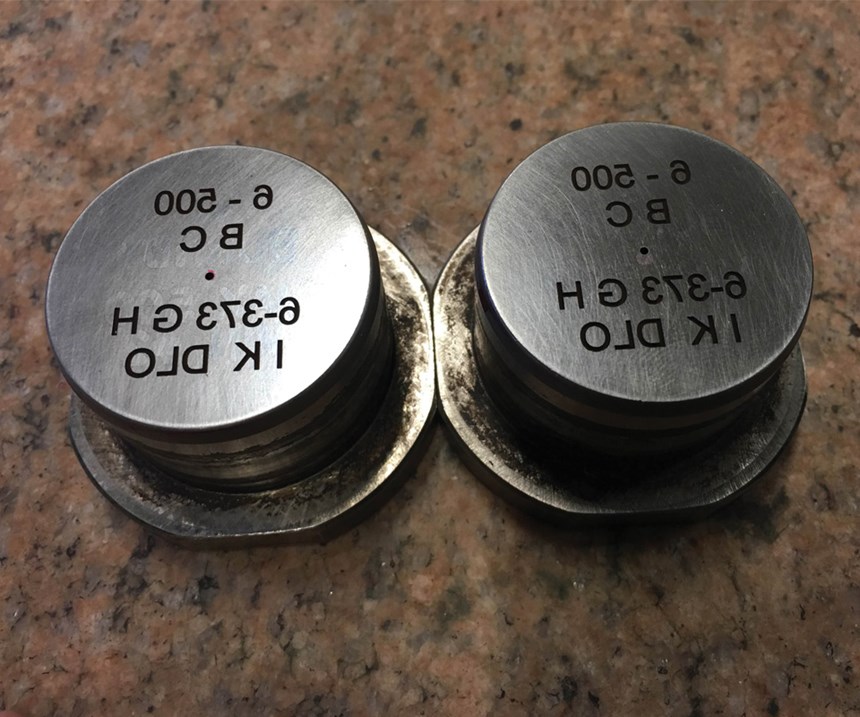
Mold engraving may be perceived as a purely aesthetic endeavor, but it holds immense significance in various industries and applications –
- Aesthetic Appeal: Engravings can transform a plain plastic surface into a work of art. They add unique and eye-catching visual elements that elevate the overall look of the product.
- Branding and Customization: Manufacturers can use mold engravings to embed logos, serial numbers, or brand names directly onto the product. This not only reinforces brand identity but also helps in product traceability.
- Texture and Grip: Engravings can provide texture to surfaces, enhancing grip and making products more user-friendly. This is especially valuable in applications where a secure grip is essential, such as handles and tool grips.
- Functionality: Engravings can be functional as well as decorative. For instance, they can aid in light diffusion, reduce glare in display screens, or ensure even paint distribution in automotive interiors.
Techniques of Mold Engraving
Mold engraving is a meticulous process that requires precision and expertise. Here are some common techniques used in mold engraving –
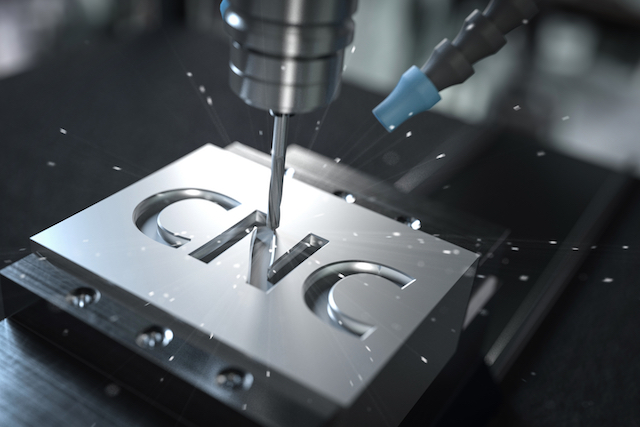
- Computer Numerical Control (CNC) Machining: CNC machining involves using computer-controlled tools to carve out intricate designs on the mold surface. This method allows for precise and repeatable engravings and is suitable for both simple and complex patterns.
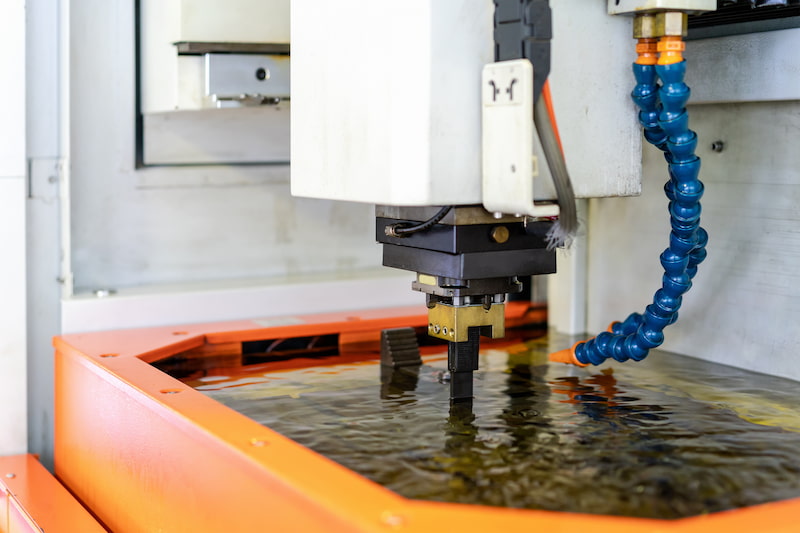
2. Electro Discharge Machining (EDM): EDM uses electrical discharges to erode material from the mold surface. It is particularly useful for creating fine details and complex shapes, making it ideal for engraving molds for micro-components.
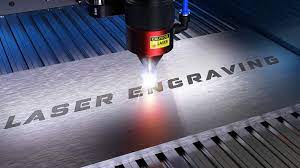
3. Laser Engraving: Laser engraving uses a focused laser beam to remove material from the mold’s surface. It offers exceptional precision and is well-suited for detailed and intricate designs. Laser engraving can also create 3D textures by varying the laser intensity.
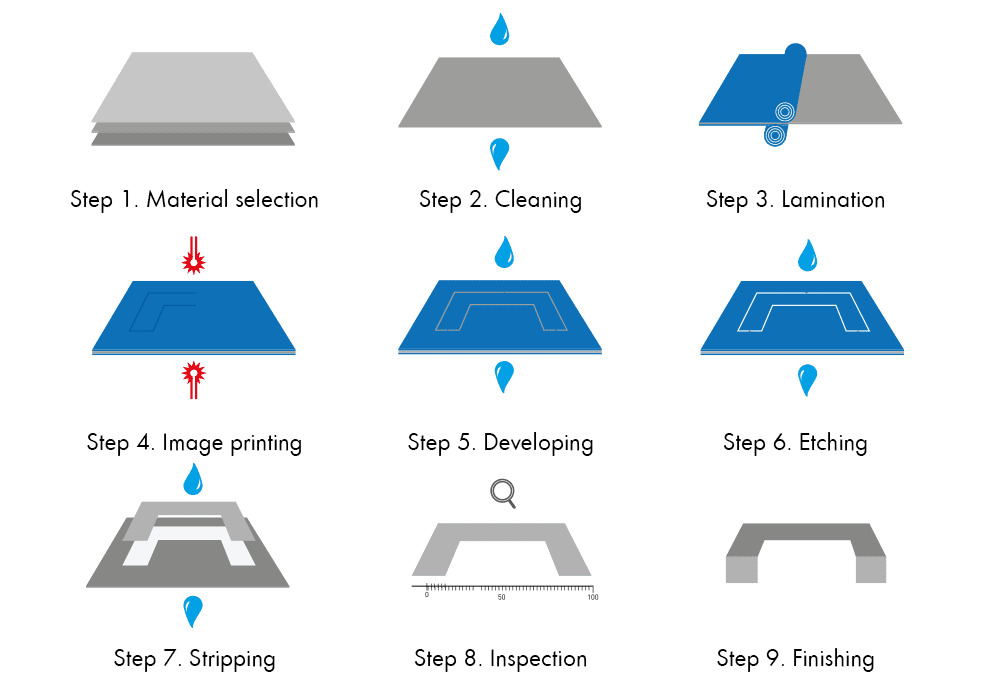
4. Chemical Etching: Chemical etching involves selectively removing material from the mold surface using chemicals. This method is highly controllable and can achieve precise, fine engravings. It’s often used for texturing molds.
Precision and Artistry
Mold engraving is a fusion of precision engineering and artistic craftsmanship. Achieving the desired design or texture requires not only technical skill but also a keen eye for aesthetics. Manufacturers and mold engravers collaborate to ensure that the final product meets both functional and visual requirements.
Additionally, advancements in technology, such as the use of 3D modeling and computer-aided design (CAD), have revolutionized mold engraving. These tools enable designers to create complex and intricate engravings with a level of precision that was once unimaginable.
Applications of Mold Engraving
Mold engraving has a wide range of applications across industries –
- Consumer Electronics: The sleek and minimalist appearance of electronic devices often benefits from precise and elegant mold engravings, enhancing the user experience.
- Automotive Industry: Mold engraving is frequently employed in automotive interiors to create textured surfaces for dashboards, steering wheels, and instrument panels. These textures not only improve aesthetics but also reduce glare and improve grip.
- Medical Devices: Mold engravings play a crucial role in medical devices where precision and functionality are paramount. Engraved textures can enhance the grip on surgical instruments or provide tactile feedback on medical equipment.
- Cosmetics Packaging: Cosmetic products often come in intricately designed containers and bottles. Mold engravings are used to create the fine details and textures that make these packaging options stand out.
- Aerospace: In aerospace applications, mold engravings can be used to create lightweight yet durable components with unique surface characteristics. This is particularly important for reducing weight and improving fuel efficiency.
- Custom Products: For products that require unique designs or branding, mold engraving allows for customization that sets them apart in the market.
Pros & Cons of Mold Engraving
Mold engraving, the process of creating intricate designs, patterns, or textures on the surface of a mold cavity, is a valuable technique in the field of injection molding. Like any manufacturing process, it comes with its set of advantages and disadvantages. In this article, we’ll explore the pros and cons of mold engraving to help you better understand when and why it’s a beneficial choice and when it might have limitations.
Pros of Mold Engraving
1. Aesthetic Appeal
One of the most significant advantages of mold engraving is its ability to enhance the visual appeal of plastic products. Intricate and eye-catching designs or textures can be created, making products stand out in the market. This is particularly valuable in industries like consumer electronics, cosmetics, and automotive, where aesthetics play a crucial role in consumer preferences.
2. Branding and Customization
Mold engraving allows manufacturers to embed logos, brand names, serial numbers, or custom designs directly onto the product’s surface. This reinforces brand identity, aids in product traceability, and offers customization options to cater to specific customer needs.
3. Improved Functionality
Engravings can serve functional purposes as well. For example, they can provide a grip on handles, reduce glare on display screens, or facilitate even paint distribution. This dual functionality makes mold engraving valuable in applications where both form and function are essential.
4. Precision and Consistency
Mold engraving techniques, such as CNC machining and laser engraving, offer high precision and repeatability. This ensures that the same design or texture can be replicated consistently across multiple parts, maintaining product quality and consistency.
5. Versatility
Mold engraving techniques are versatile and can be applied to a wide range of materials, including various plastics, metals, and composites.
Cons of Mold Engraving
1. Cost
One of the significant drawbacks of mold engraving is the cost associated with the process. Engraving intricate designs or textures, especially on complex molds, can be time-consuming and may require specialized equipment and skilled labor.
2. Design Limitations
While mold engraving offers creative freedom, there are limitations to the complexity of designs that can be achieved. Highly intricate or three-dimensional designs may be challenging or expensive to implement, depending on the chosen engraving technique.
3. Tool Wear and Maintenance
The process of mold engraving can lead to tool wear over time, especially when abrasive materials or complex textures are involved. Regular maintenance and, eventually, tool replacement may be necessary, adding to production costs.
4. Production Speed
Depending on the complexity of the engraving and the chosen technique, mold engraving can slow down the production process. This can be a significant concern in industries where high production rates are crucial.
5. Material Compatibility
Not all materials are suitable for mold engraving. Some plastics may not hold the engraving details well, or the engraving process may affect the material’s properties. Manufacturers must carefully consider material selection when opting for mold engraving.
Conclusion
Mold engraving may be an understated aspect of injection molding, but its impact on the final product is undeniable. From enhancing aesthetics to improving functionality and allowing for branding and customization, mold engravings serve a multitude of purposes across various industries.
As technology continues to advance, mold engraving will likely become even more sophisticated, enabling manufacturers to create products that not only meet functional requirements but also delight customers with their intricate and captivating designs. So, the next time you encounter a beautifully textured or finely engraved plastic product, you can appreciate the artistry and precision that went into its creation through the fascinating world of mold engraving.
FAQ’s
What is Mold Engraving?
Mold engraving is a process in injection molding that involves creating intricate and detailed designs, patterns, or textures on the surface of the mold cavity. These engravings are then transferred onto the final plastic product during the injection molding process. Mold engraving serves several purposes, including enhancing aesthetics, improving functionality, enabling branding and customization, and adding texture to the product’s surface.
The engraving process typically involves specialized equipment and techniques, such as CNC (Computer Numerical Control) machining, electro-discharge machining (EDM), laser engraving, or chemical etching. These methods allow for precision and repeatability in creating the desired engravings on the mold’s interior surface.
The engravings can range from simple logos and patterns to complex three-dimensional textures.
Mold engraving is commonly used in industries such as consumer electronics, automotive, cosmetics packaging, medical devices, aerospace, and more. It allows manufacturers to add visual appeal, texture, branding, and functional elements to their plastic products, making them more attractive and user-friendly.
How deep should Engraving be?
The depth of engraving in an injection mold depends on several factors, including the specific design intent, the material being molded, and the capabilities of the engraving method or equipment. There is no one-size-fits-all answer to how deep engraving should be, as it can vary widely based on these considerations. Here are some general guidelines:
Design Intent: The depth of the engraving should align with the design intent. For example, if the engraving is primarily for aesthetic purposes, the depth may be relatively shallow to create a subtle texture or pattern. However, if the engraving serves a functional purpose, such as improving grip on a handle, it may need to be deeper for effectiveness.
Material Compatibility: Consider the material being used for the injection molding process. Some plastics may not hold deep engravings well, as they can lead to stress concentrations or affect the material’s structural integrity. It’s essential to balance the desired depth with material compatibility.
Engraving Method: The method used for engraving, whether it’s CNC machining, EDM, laser engraving, or chemical etching, will influence the achievable depth. Consult with experts in the chosen engraving method to determine the practical depth of your specific project.
Mold Durability: Deeper engravings may put more stress on the mold, potentially leading to faster wear and tear. Mold durability and maintenance requirements should be considered when determining engraving depth.
Product Functionality: If the engraving serves a functional purpose, such as enhancing grip or reducing glare, the depth should be sufficient to achieve the desired effect. Testing and prototyping may be necessary to determine the optimal depth for functional engravings.
Aesthetic Considerations: For purely aesthetic engravings, the depth can be adjusted to achieve the desired visual impact. However, deeper engravings may create more pronounced textures or patterns.
What is the minimum thickness for Engraving?
The minimum thickness for engraving in an injection mold can vary depending on several factors, including the design intent, the material being molded, and the capabilities of the engraving method or equipment. There is no fixed minimum thickness for engraving, as it is influenced by these considerations. However, here are some general guidelines:
Design Intent: The minimum thickness for engraving should align with the design intent. If the goal is to create subtle patterns or textures for aesthetic purposes, the engraving may be relatively shallow with minimal thickness. However, if the engraving serves a functional purpose, such as grip enhancement, it may need to be thicker to be effective.
Material Compatibility: Consider the material used for injection molding. Some plastics may not hold very shallow engravings well, as they may not be visible or may be prone to filling during the molding process. Ensure that the chosen thickness is sufficient for the engraving to be noticeable and serve its intended purpose.
Engraving Method: The engraving method or equipment used will influence the achievable minimum thickness. Each method has its own capabilities and limitations. Consult with experts in the chosen engraving method to determine the practical minimum thickness for your specific project.
Mold Durability: Very shallow engravings may have minimal impact on mold durability, but they should still be deep enough to be durable over the course of many molding cycles. Extremely thin engravings may wear down quickly, leading to reduced mold lifespan.
Product Functionality: If the engraving serves a functional purpose, ensure that the minimum thickness is sufficient to achieve the desired effect. For grip enhancement, for example, the thickness should provide adequate texture.
Aesthetic Considerations: For purely aesthetic engravings, the minimum thickness can be adjusted to achieve the desired visual impact. Extremely thin engravings may be more delicate and subtle in appearance.
What are the Precautions for Etching?
Etching is a chemical process used to selectively remove material from the surface of a mold to create textures, patterns, or designs. It can be a powerful technique in mold making, but it requires careful handling and safety precautions. Here are some important precautions to take when performing etching –
Chemical Safety:
Always work with etching chemicals in a well-ventilated area or under a fume hood to minimize exposure to fumes.
Wear appropriate personal protective equipment (PPE), including chemical-resistant gloves, safety goggles, and a lab coat.
Familiarize yourself with the specific chemicals being used and their safety data sheets (SDS).
Storage and Handling:
Store etching chemicals in a designated, well-marked area away from incompatible substances.
Handle chemicals with care, avoiding spills and splashes.
Use chemical-resistant containers and equipment when working with etching solutions.
Temperature Control:
Maintain precise control over the temperature of the etching solution. Temperature variations can affect the etching process and the quality of the texture.
Proper Mixing:
Follow the manufacturer’s instructions for mixing etching solutions carefully. Incorrect mixing ratios can result in ineffective etching or uneven textures.
Substrate Compatibility:
Ensure that the mold substrate (usually metal) is compatible with the chosen etching solution. Some metals may react unfavorably with certain chemicals.
Acid Resistance:
Make sure that the mold components and equipment used in the etching process are resistant to the acids used. Acid-resistant materials like stainless steel or certain plastics should be used.
Appropriate Tools and Equipment:
Use specialized tools and equipment designed for etching, including acid-resistant brushes or rollers for applying the solution.
Emergency Response:
Have appropriate safety measures and equipment in place for emergency situations, such as an eye wash station and a chemical spill kit.
Personal Hygiene:
Avoid eating, drinking, or smoking in areas where etching chemicals are being used.
Wash hands and any exposed skin thoroughly after handling etching chemicals.
Waste Disposal:
Dispose of used etching solutions and waste materials according to local regulations. Do not pour chemicals down the drain or dispose of them improperly.
Training and Supervision:
Ensure that personnel involved in the etching process are properly trained in the handling of chemicals and are aware of safety protocols.
Supervise the etching process, especially if performed by individuals who may be less experienced.
First Aid:
Have a first aid kit on hand and know how to provide first aid in case of accidental exposure or chemical contact.
Emergency Contacts:
Keep emergency contact numbers for poison control and local emergency response readily available.
Etching can be a highly effective method for creating mold textures, but it involves working with potentially hazardous chemicals. Following these precautions and safety guidelines is essential to protect both the individuals involved in the process and the environment. Always consult the manufacturer’s instructions and relevant safety regulations when performing etching operations.
What is Etching in Mold?
Etching in moldmaking refers to a process of selectively removing material from the surface of a mold cavity or core to create specific patterns, textures, or designs. This technique is commonly used in injection molding to impart various surface finishes or functional textures to plastic parts during the molding process. Etching can add visual appeal, improve grip, reduce glare, and serve other purposes depending on the design and intent.
The etching process typically involves the use of chemicals or mechanical methods to remove material from the mold’s surface. Here’s how it generally works:
Design: The first step in mold etching is to design the desired pattern or texture. This design is based on the intended purpose of the texture, whether it’s for aesthetics, functionality, or branding.
Preparation: The mold surface is prepared by cleaning and, if necessary, polishing to ensure it’s free from contaminants and has a uniform surface.
Application of Etching Solution: Depending on the specific etching method chosen, an etching solution or chemical is applied to the mold’s surface. This solution selectively dissolves or removes material, creating the desired texture or pattern.
Controlled Etching: The etching process is carefully controlled in terms of time, temperature, and chemical concentration to achieve the desired depth and quality of the texture.
Rinsing and Neutralization: After etching, the mold is thoroughly rinsed to remove residual chemicals. A neutralizing solution may be used to ensure that any remaining acidic or alkaline residues are neutralized.
Final Inspection: The mold is inspected to verify that the etched texture meets the design specifications and quality standards. Adjustments may be made if needed.
Integration into Injection Molding: The textured mold components, such as inserts, are integrated into the mold base. These textured components transfer the texture onto the plastic part during injection molding.
Injection Molding: The injection molding machine is used to produce plastic parts with the desired texture, replicating the surface finish created through etching.
Mold etching can be performed using various techniques, including chemical etching, electro-discharge machining (EDM), laser etching, or mechanical etching methods. The choice of method depends on the complexity of the design, the material being used, and other factors.

It’s really a nice and useful piece of info. I’m happy that you shared this helpful info with us. Please stay us up to date like this. Thank you for sharing.